What will you learn?
In this step-by-step guide, you are going to learn how to make a Minecraft server hosted from your own computer.
Why make your own Minecraft Server?
- Control: Hosting your own server gives you complete control over the gameplay experience. You can customize the server settings, install mods or plugins, and create your own rules and restrictions.
- Privacy: Running your own server allows you to play with a select group of friends or invite-only community, ensuring a more private and secure environment.
- Cost: Hosting a server on your own PC can be more cost-effective than renting one from a hosting provider. It eliminates recurring fees and gives you more flexibility with server resources.
- Performance: With a dedicated server running on your PC, you have more control over the hardware and network settings, potentially leading to better performance and reduced lag for you and your players.
- Flexibility: Running your own server allows you to easily switch between different Minecraft versions, experiment with different gameplay modes, and quickly adapt to your preferences.
- Learning Experience: Hosting a Minecraft server provides an opportunity to learn about server administration, networking, and troubleshooting. It can be a rewarding educational experience for those interested in technology and server management.
It’s important to note that hosting a server on your own PC requires technical knowledge, proper hardware and software configuration, as well as an understanding of security considerations to protect your network and personal data. However, there is nothing to fear, we will make sure to walk you through making the perfect server for Minecraft with this guide.
Guide
Step 1 – Download the Minecraft Server File
Click the button on the right, which will redirect you to the download site for the Minecraft server file.
Once in the Minecraft website, click the green link named “minecraft_server.[minecraftversion].jar. In this case we will be downloading the available version which is the most recent, 1.19.2.

You should see the download begin

Step 2 – Create a Minecraft Server
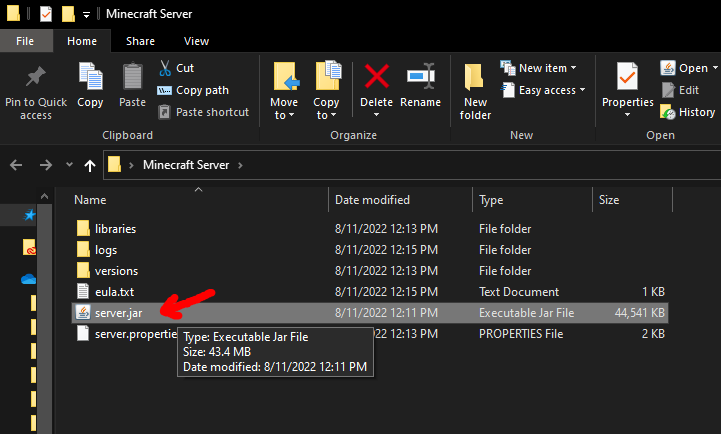
Drag the newly downloaded server.jar file into the folder where you want to install the server on.

Once the server.jar file has been moved into the desired folder, go ahead and open the jar file by double-clicking on it.
Keep in mind that you will need Java 17 or above installed for any version of Minecraft above 1.16.5.

After you double-click the server.jar file, it will begin to extract some files into the folder until the Eula.txt file appears.
Go ahead and open this EULA file.

Inside the EULA file you should find a text labeled “eula=false”, go ahead and change the text from “eula=false” to “eula=true”.

It should now read like this, with no space after the word “true”.

Proceed to save the file and then close it.

Now with the Eula updated, go ahead and double-click the server.jar file again.
As you can see, you now have a server console with all the activity regarding your server.

You can stop the server at any time by typing stop into the console and then pressing Enter in your keyboard.

Done!
You now have a working Minecraft server hosted on your own pc, in order to access the server just open Multiplayer mode in Minecraft, click add a server, and type localhost in the address bar.
Let us know in the comments if we were able to help you install the server properly and if there is something we can improve up on.