***WARNING***
Before you continue with this guide, you need to know Java 18 has been discontinued from the Oracle website, we recommend that you use Java 17 instead.
What will you learn?
In this step by step, you will learn how to download and install Java 18 or JDK 18 for Windows. This will allow you to run jar files that require a newer installation of Java.
Installing Java can be a hard process, and we understand that.
Which is why we tried to make it as simple as possible with our step-by-step guide.
Guide
Step 1
Click the button on the right, which will launch the Java Oracle Website to download Java 18 Installer.
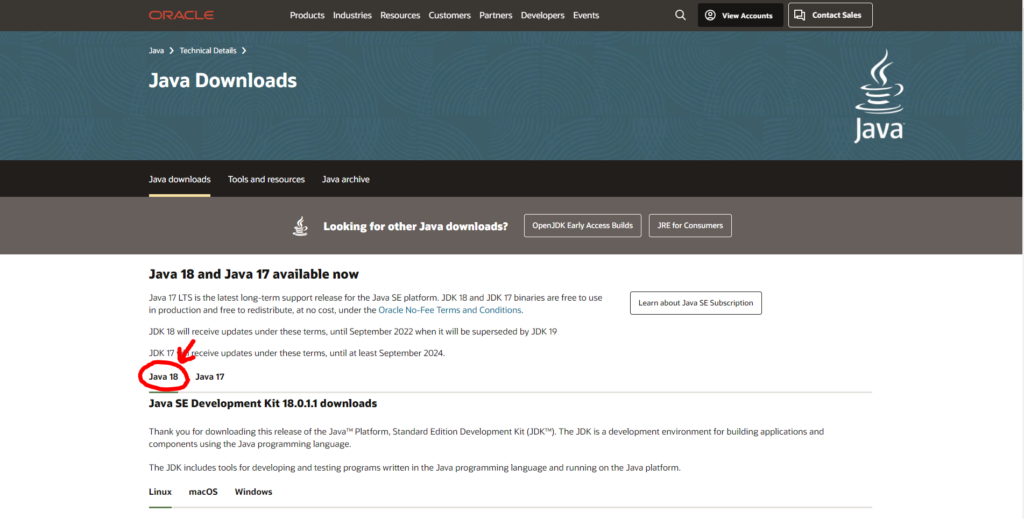
Step 2
Select Java 18, keep in mind that Java 18 might of have been discontinued, you can select Java 17 and follow the same steps. You can also click here for a Java 17 installation guide.
Step 3
Select your Operating System most of us will select Windows. However, feel free to select the OS that you are using.

Step 4
Select x64 Installer and click on the blue link, which will immediately trigger the download on the bottom left if you are using Chrome.

Step 5
Click on the Installer on the bottom left if you are using Chrome. (If you can’t find it, look in your downloads’ folder)

Step 6
When you click on the installer, you might get an administrator sign. Allow the app to run and that will bring you to the following screen.

Step 7
Now, Click Next.

Step 8
Click Next one more time.

Step 9
Select Close after the installation has finished. You have successfully installed Java 18.

Done!
You now have Java 18 and are able to enjoy all the advantages of having the newest installation of Java in your PC.
Let us know in the comments if we were able to help you install Java properly and if there is something we can improve up on.
Also, if you have any questions, don’t forget to leave them down in the comment section!