What will you learn?
In this step-by-step tutorial, you will learn how to download and add the Night Vision Resource/Texture pack to Minecraft.
The NightVision texture pack is a resource pack for Minecraft that changes the appearance of the game to make it easier to see in dark environments. It does this by adding a glowing effect to certain blocks and items, such as torches, glowstone, and enchanted items. This allows players to more easily navigate dark areas, such as caves and abandoned buildings, without the need for artificial lighting.
The NightVision texture pack is primarily designed for use in survival mode, where players must gather resources and craft items to survive. It can also be used in creative mode, where players have access to unlimited resources and can build and explore without the constraints of survival.
Do keep in mind that in order to run NightVision you will need an updated version of Optifine installed on your computer.
Learn how to download and Install Optifine here.
Guide
Step 1
Click the button on the right labeled as Night Vision to redirect you to the Night Vision download website.

Step 2
Once in the night vision page, make sure you are in the “Files” menu and look for the desired version of the Night Vision Resource Pack. In this guide, we are going to be download Night Vision 1.19.3.
Once you found your desired version, click download.

Step 3
Once you clicked download for your desired version, you should see the download start after five seconds.

Step 4
Open your Optifine Minecraft version
If you do not have Optifine click here

Then go ahead and launch a world

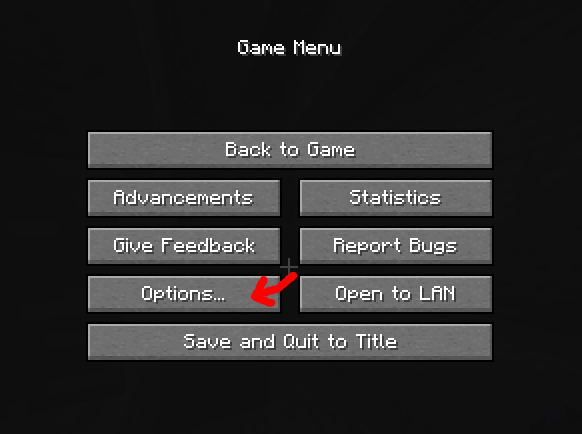
Now open your Minecraft menu by pressing the ESC key and then click on Options…
In the Options menu, click Resource Packs…

Step 6
Once in the Resource Packs menu, go ahead and click where it says Open Pack folder. This is going to launch our resources pack folder, which is going to be empty for most of you

In here go ahead and drop the file we downloaded earlier, it should be named something like “Night Vision (version)”
Then close the folder and go back to the game

Step 7
You should now see the NightVision resource pack appear inside your Minecraft game, hover over the pack and click the arrow to switch it to the proper side.

Now click done and go back to your game

Step 8
Enjoy, you now have added Night Vision properly to your Minecraft game.

Done!
You have properly learn how to add Night Vision to Minecraft using Optifine. Keep in mind that this way is working at the moment of making this guide, but it could change in the future with newer updates.
If you have any questions, feel free to comment them and our team will be in the lookout to help you as soon as possible.